基于 Hexo GitHub 从零开始搭建个人博客(五):自动部署篇
遇到任何问题,优先在本页面搜索,看看是否已经有该配置教程;
不懂得可以百度或者 Google;
还有弄不明白的可以在本站点留言,或添加站长 Wechat、QQ 等
前言
本文教程教你实现,如何将你的 Hexo 博客自动部署到多个平台
- GitHub
- GitLab
- Coding
- Gitee
优点:
- 编写文章,推送到
GitHub即可实现自动部署 - 利用
GitHub的私有仓库将博客源码直接保存在GitHub上
准备
Hexo博客源码的仓库,在GitHub上。ssh密钥,参考文章:Windows 下利用 Git 生成 SSH KEY 并配置到 GitHub
步骤
- 为需要部署的平台添加密钥
- 修改
_config.yml中的deploy配置 - 在 GitHub 上设置
Secrets - 创建 GitHub Action
为需要部署的平台添加密钥
按照之前的教程,只要你之前成功将 Hexo 的博客部署到 GitHub 上,那你电脑在 ~/.ssh 目录下一定有以下三个文件:
id_rsa:私钥id_rsa.pub:公钥known_hosts:记录对所有用户都可信赖的远程主机的公钥
将 id_rsa.pub(公钥)添加到不同平台中即可,参考文章:Windows 下利用 Git 生成 SSH KEY 并配置到 GitHub
下面是不同平台添加的地址:
修改 _config.yml 中的 deploy 配置
请使用 ssh (即以 git@ 开头的 clone 链接)的连接方式,根据直接的实际地址填写。
1 | deploy: |
在 GitHub 上设置 Secrets
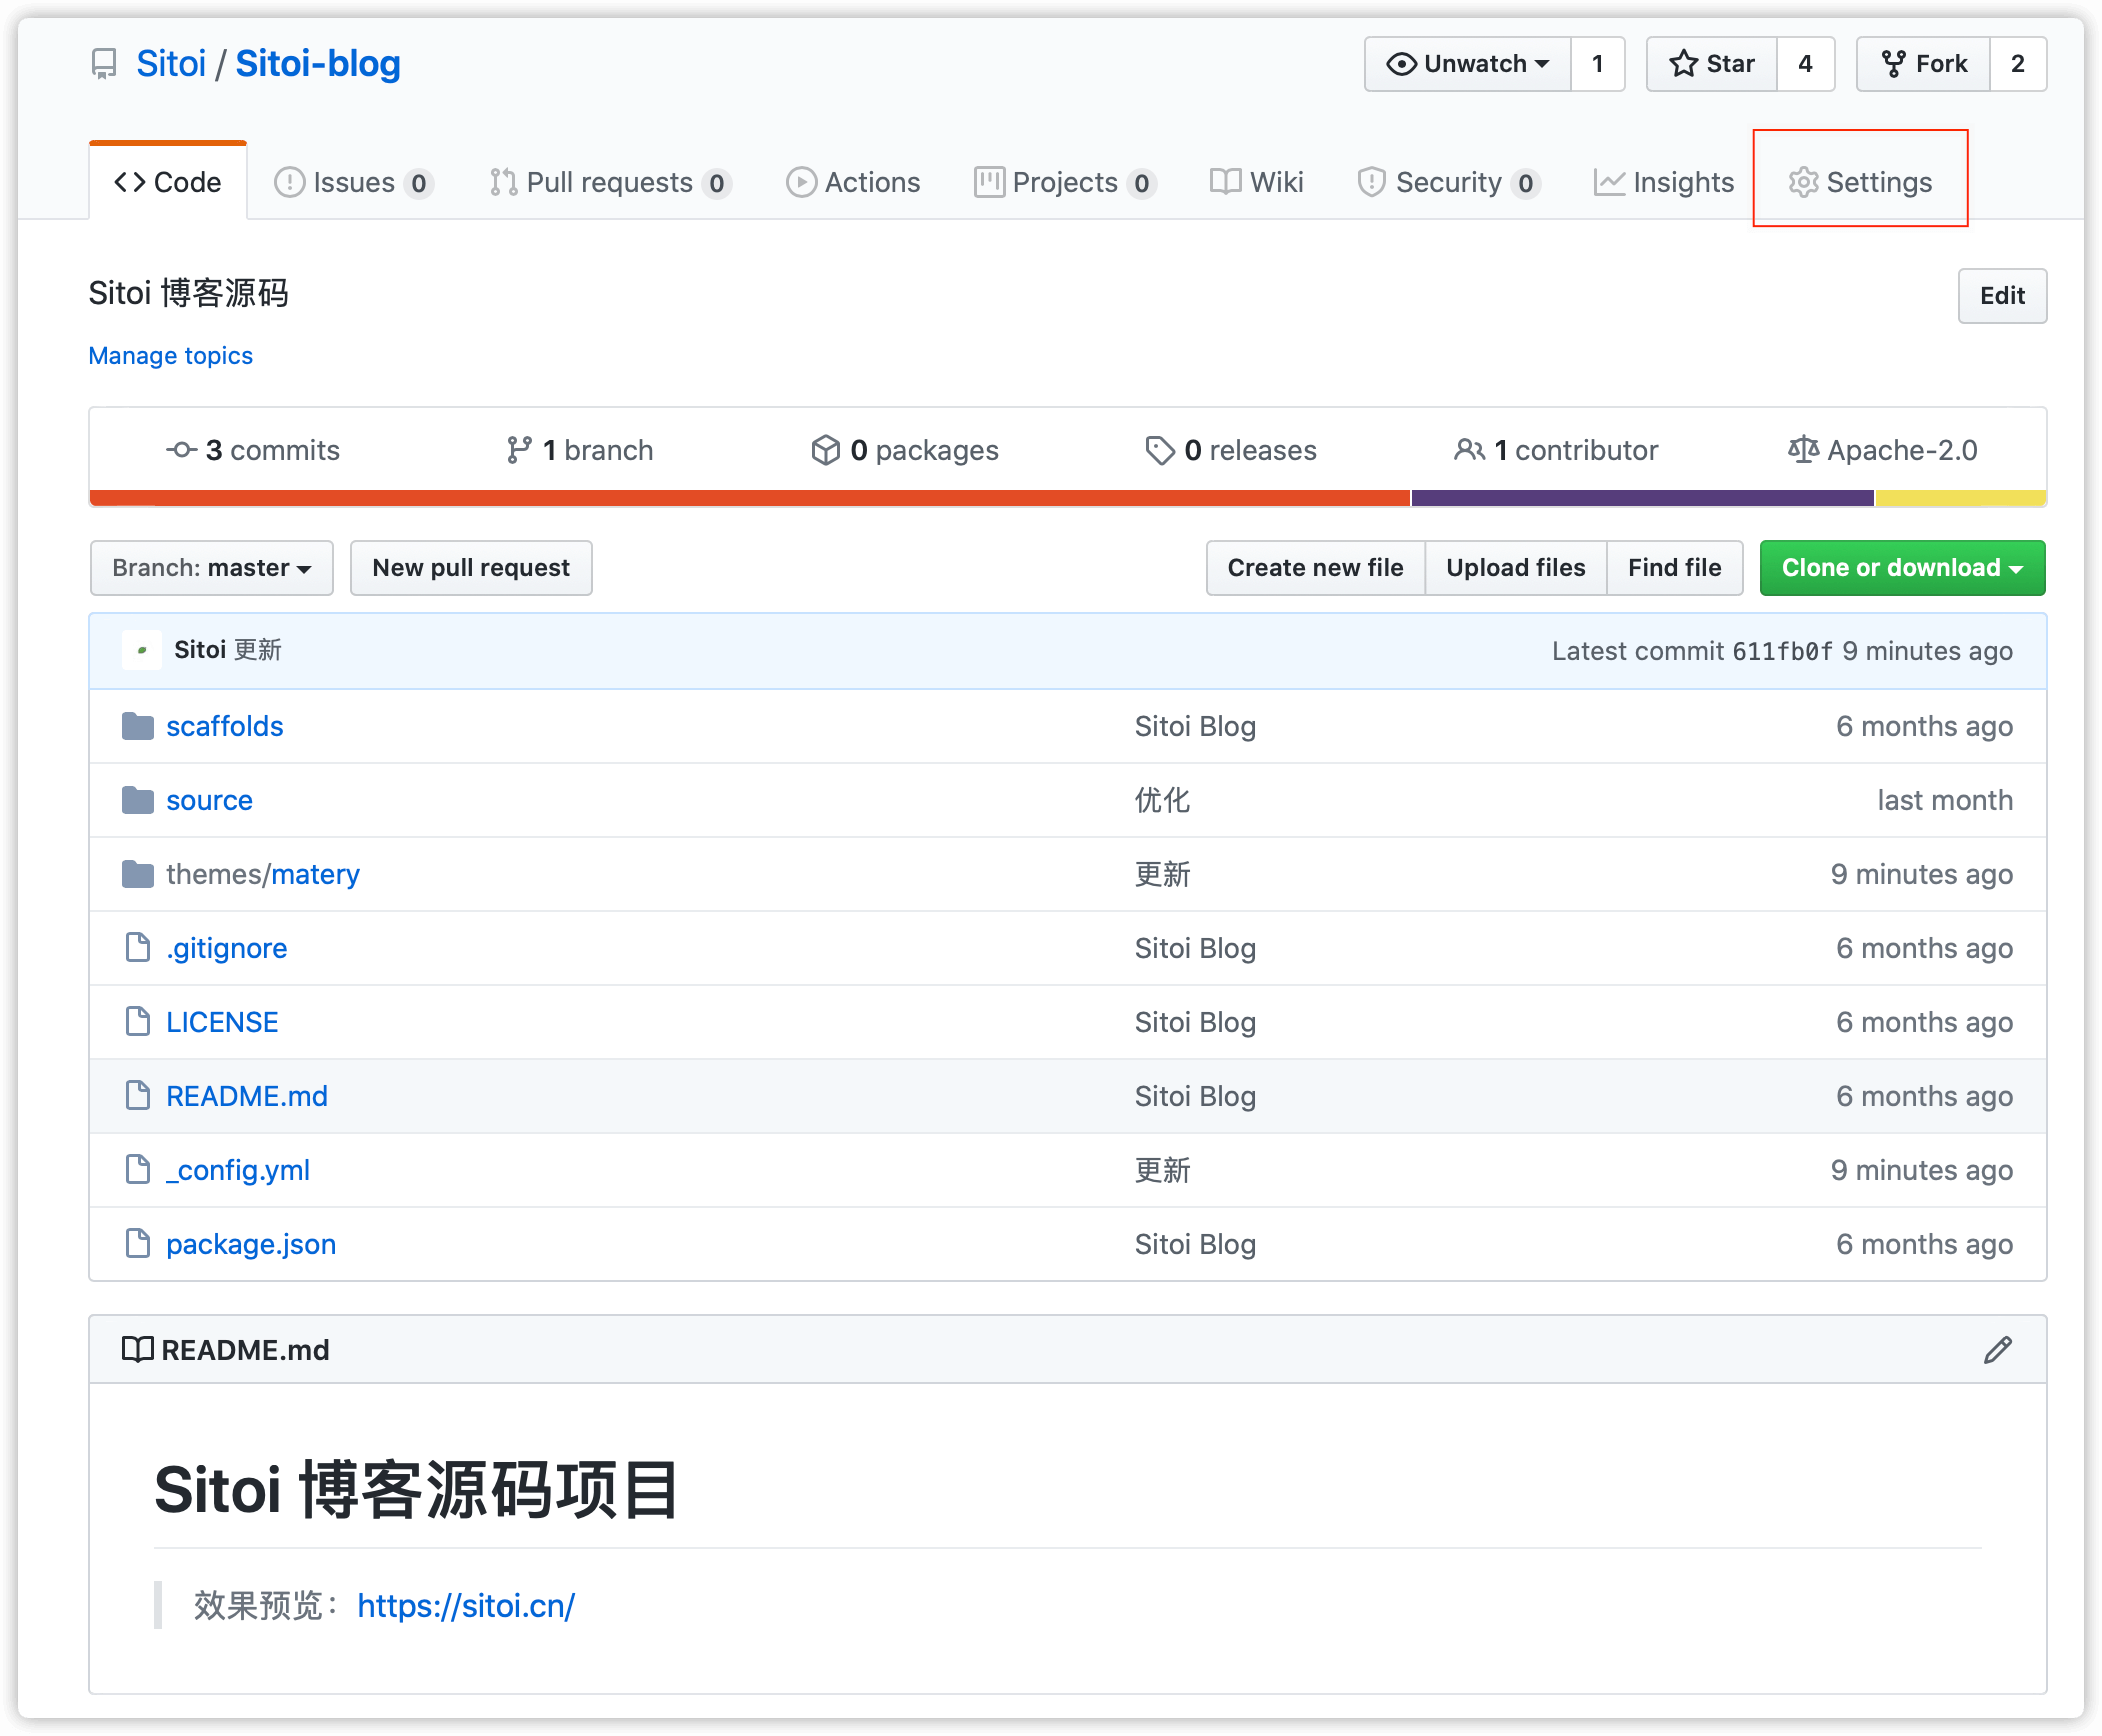
进入到你在
GitHub上面的源码仓库点击右上角的
Settings
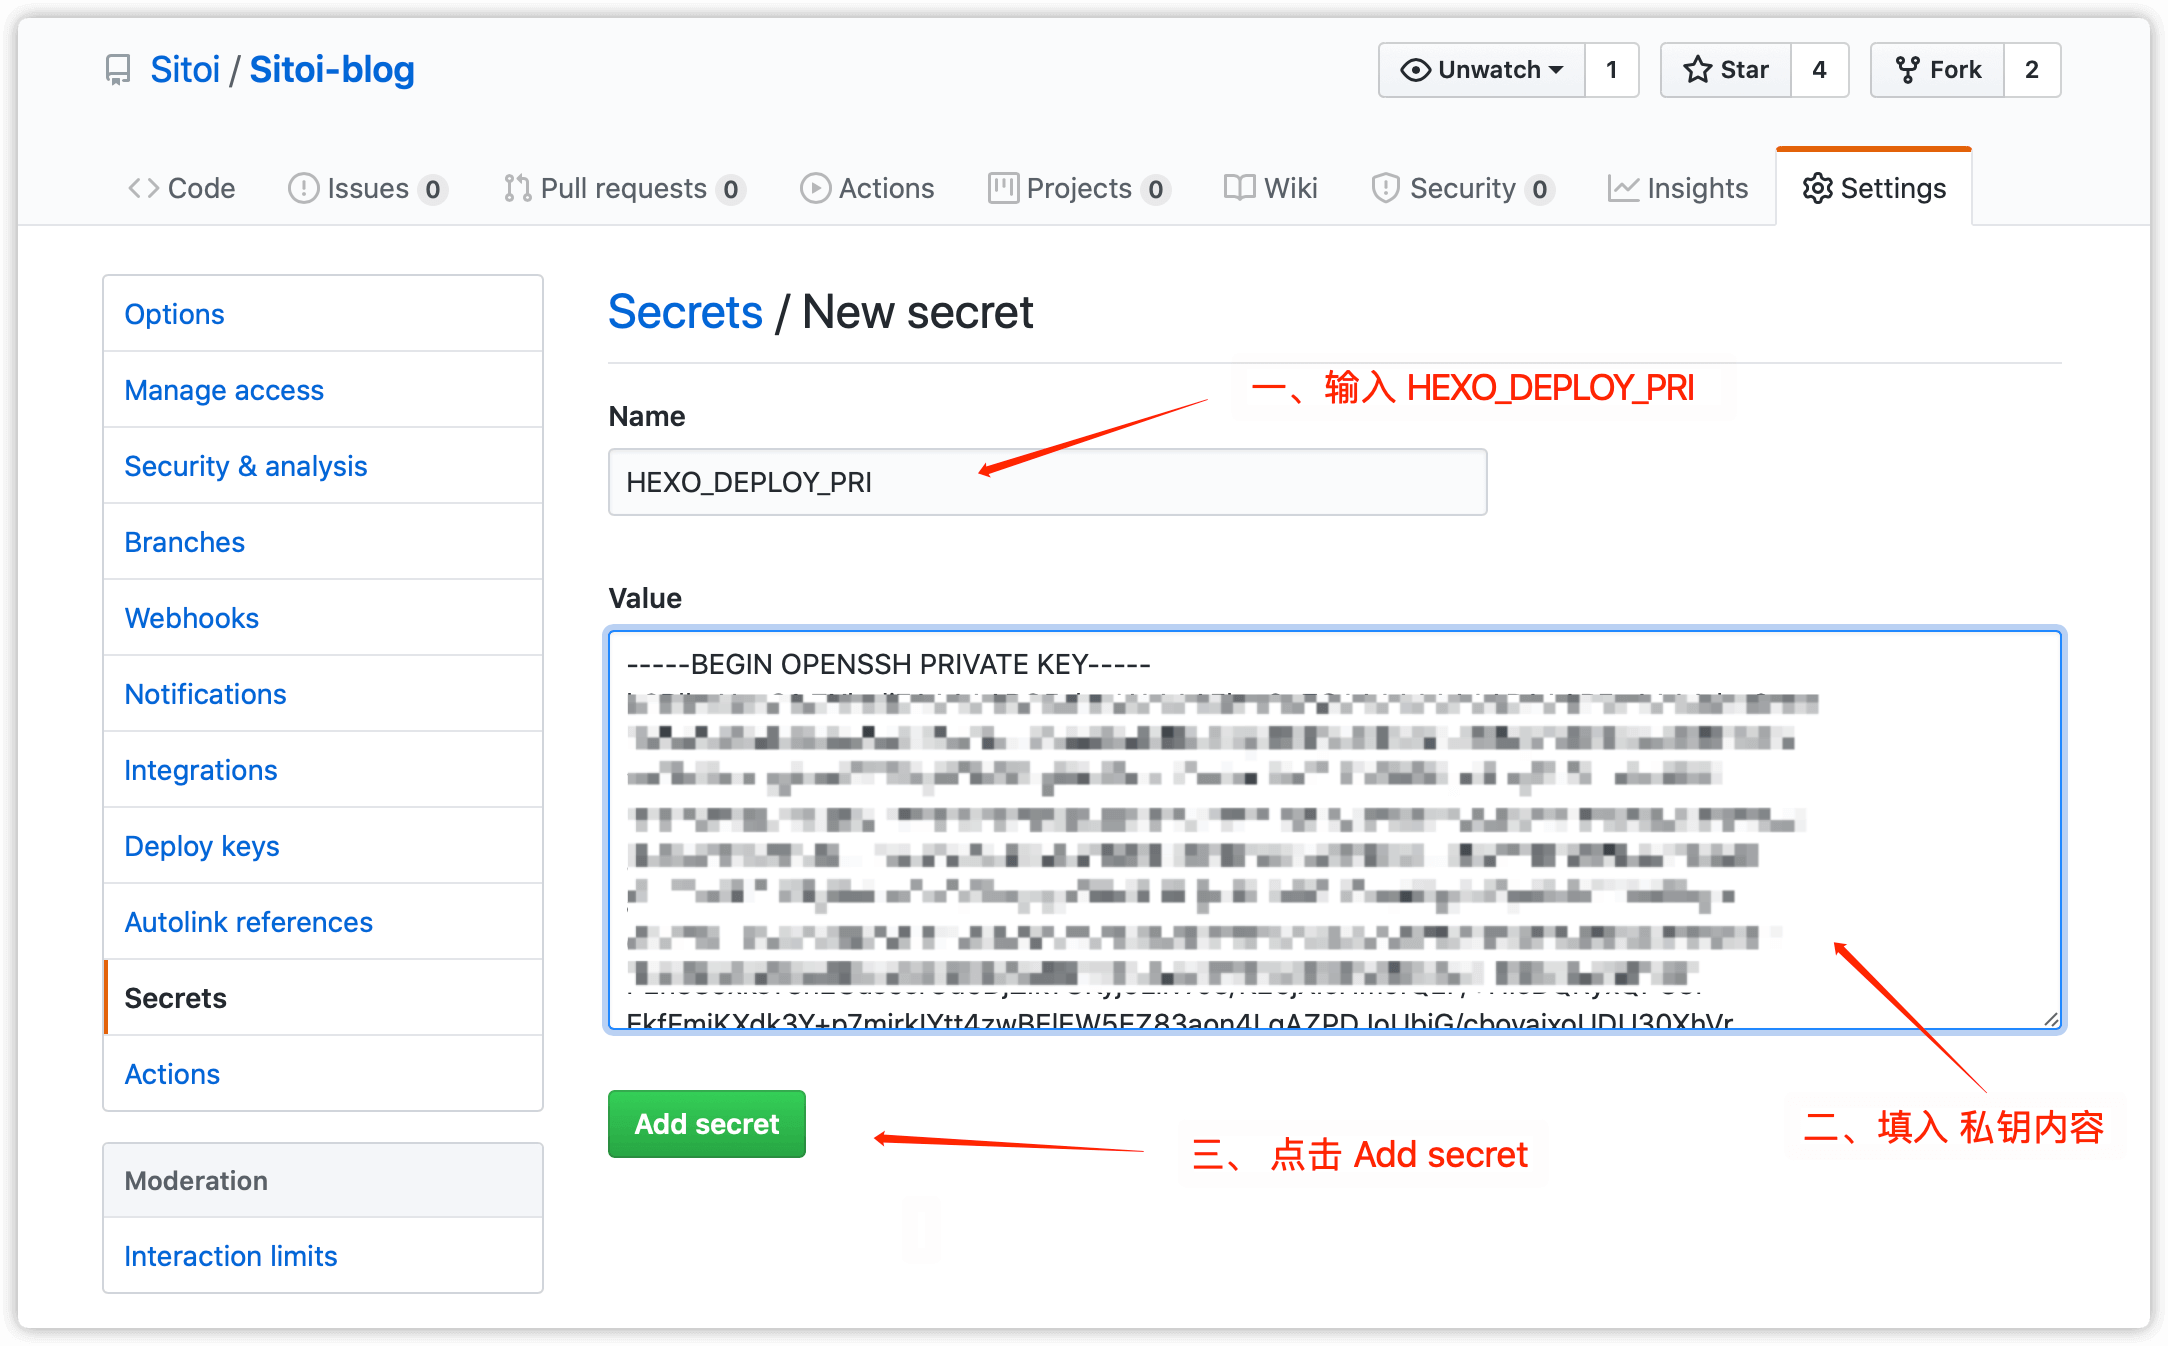
点击左侧的
Secrets点击右上角的
New secret
在
Name中输入HEXO_DEPLOY_PRI,在Value中填入id_rsa(私钥)的全部内容
创建 GitHub Action
点击项目上方的
Action按钮
点击
set up a workflow yourself创建Workflow
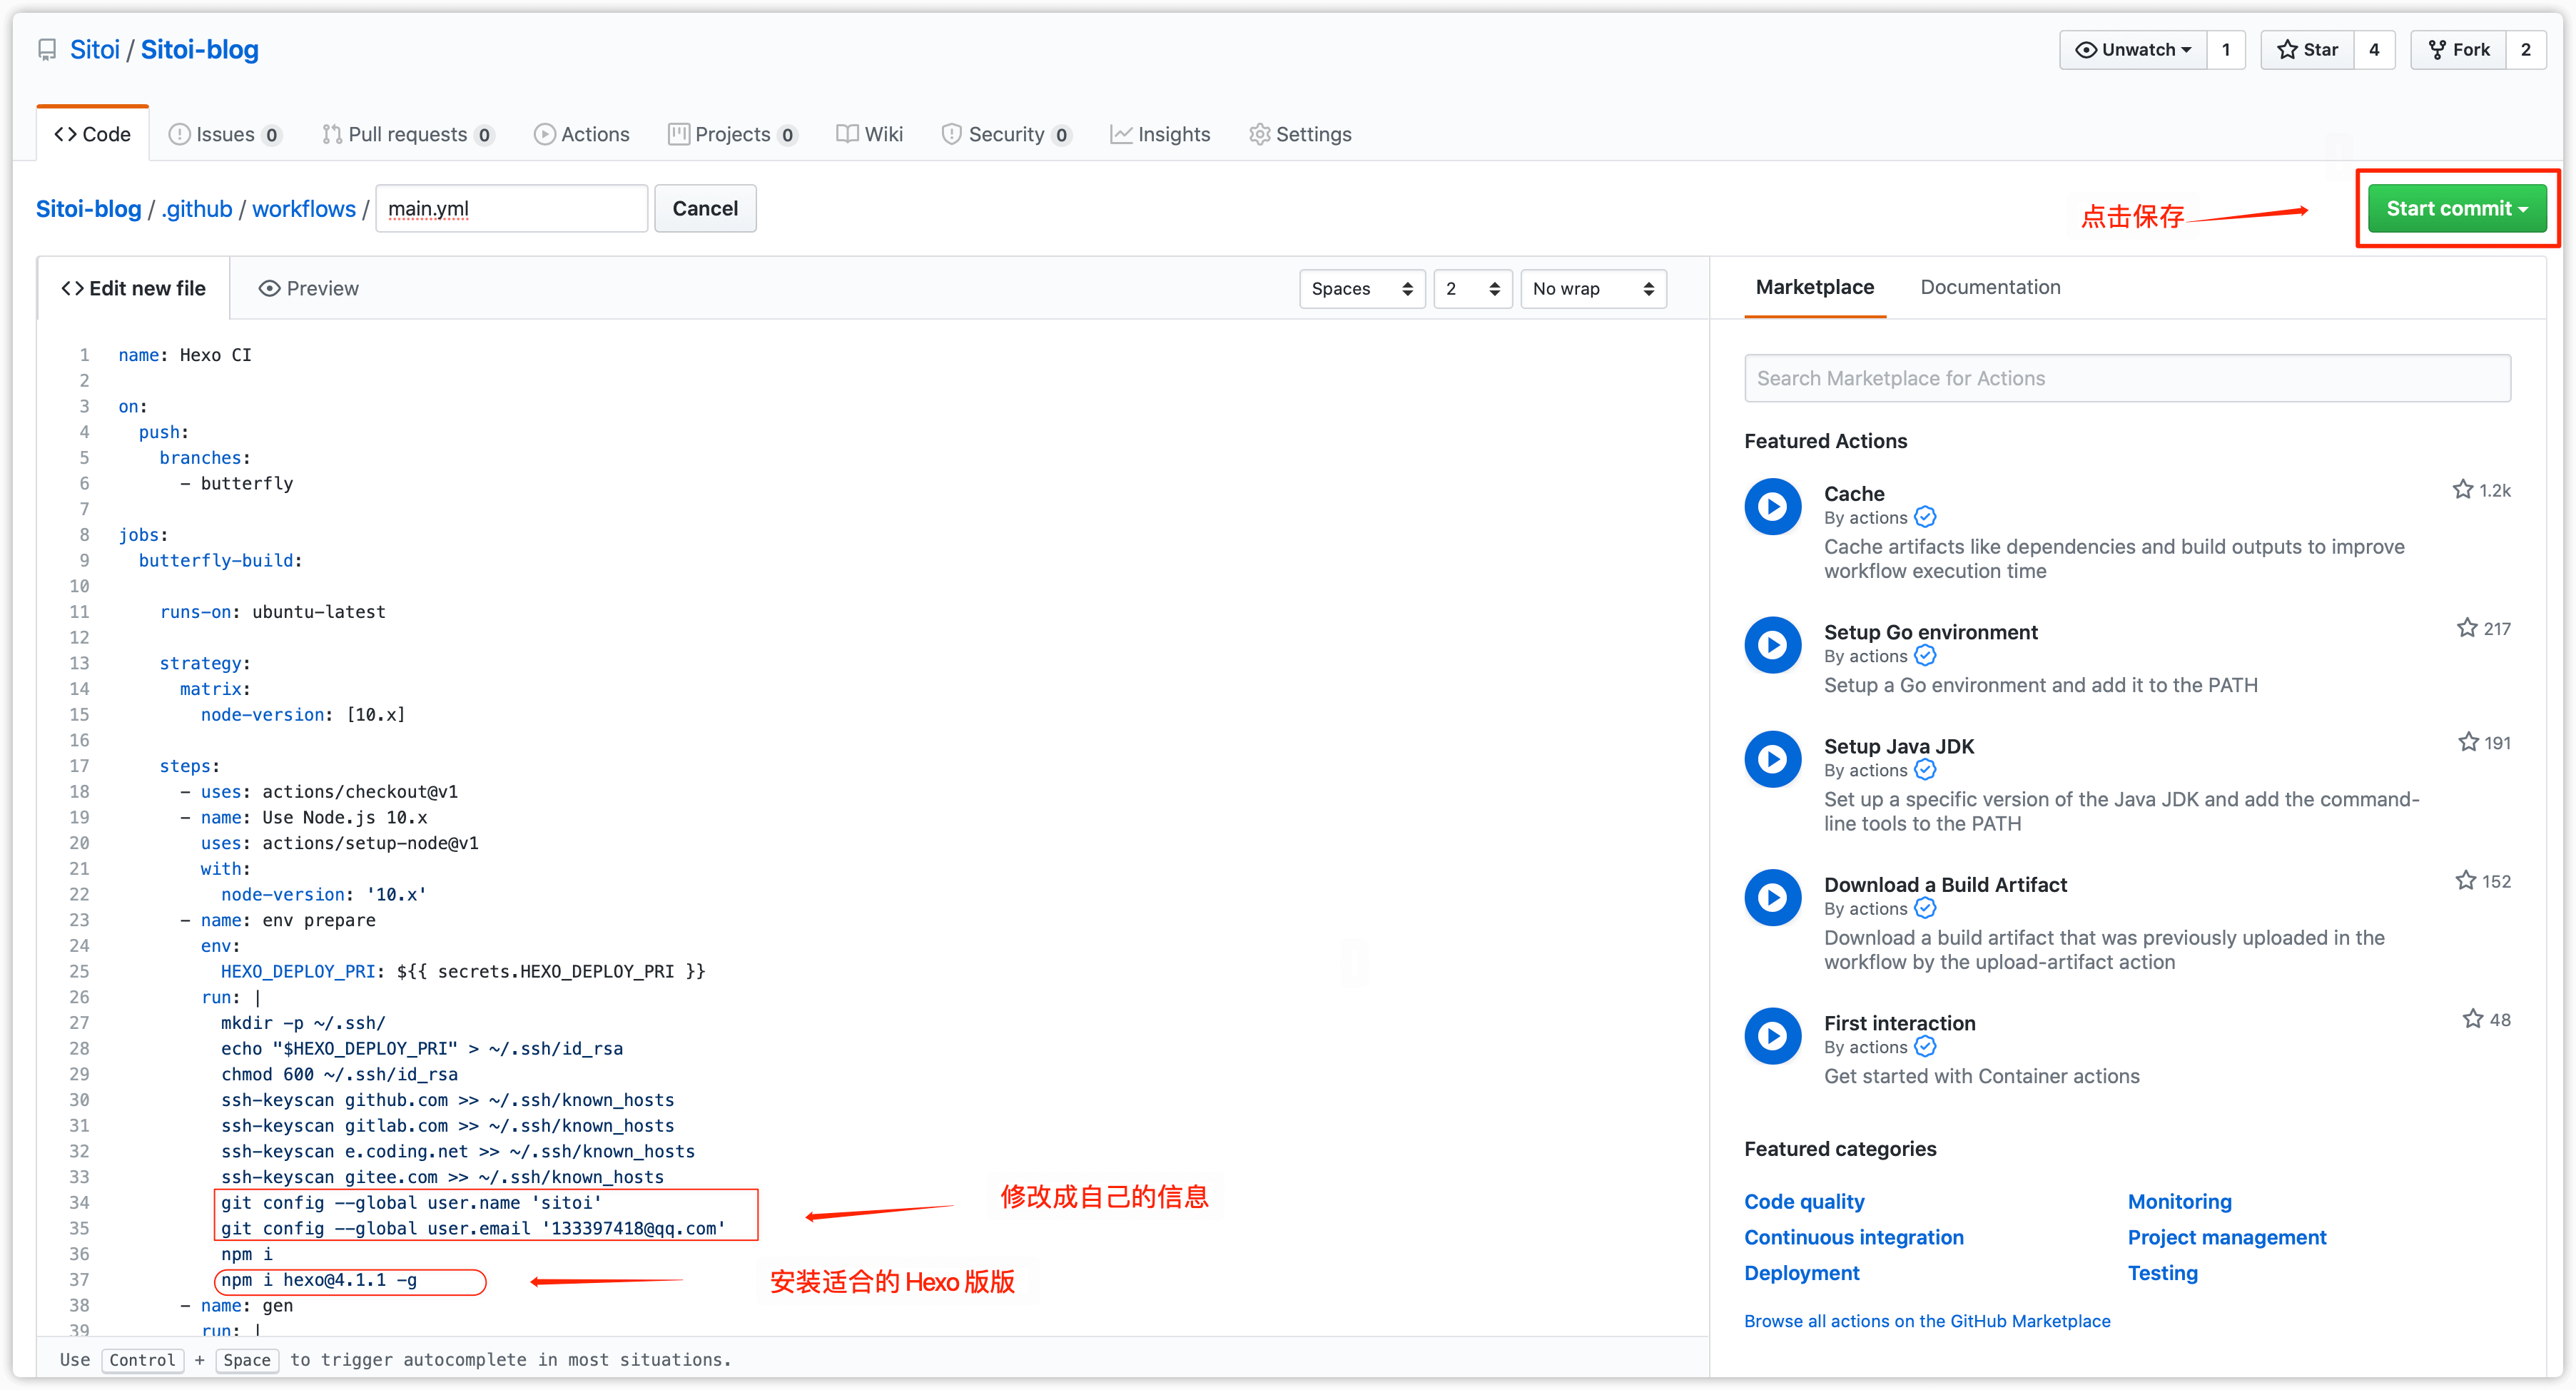
修改
main.yaml的内容
根据实际情况修改成你自己的内容
- Git 推送使用的用户名:git config –global user.name ‘sitoi’:
- Git 推送使用的邮箱:git config –global user.email ‘133397418@qq.com‘
- Hexo 的版本:npm i hexo@4.1.1 -g
1
2
3
4
5
6
7
8
9
10
11
12
13
14
15
16
17
18
19
20
21
22
23
24
25
26
27
28
29
30
31
32
33
34
35
36
37
38
39
40
41name: Hexo CI
on:
push:
branches:
- butterfly
jobs:
butterfly-build:
runs-on: ubuntu-latest
strategy:
matrix:
node-version: [10.x]
steps:
- uses: actions/checkout@v1
- name: Use Node.js 10.x
uses: actions/setup-node@v1
with:
node-version: "10.x"
- name: env prepare
env:
HEXO_DEPLOY_PRI: ${{ secrets.HEXO_DEPLOY_PRI }}
run: |
mkdir -p ~/.ssh/
echo "$HEXO_DEPLOY_PRI" > ~/.ssh/id_rsa
chmod 600 ~/.ssh/id_rsa
ssh-keyscan github.com >> ~/.ssh/known_hosts
ssh-keyscan gitlab.com >> ~/.ssh/known_hosts
ssh-keyscan e.coding.net >> ~/.ssh/known_hosts
ssh-keyscan gitee.com >> ~/.ssh/known_hosts
git config --global user.name 'sitoi'
git config --global user.email '133397418@qq.com'
npm i
npm i hexo@4.1.1 -g
- name: gen
run: |
hexo clean
hexo generate
hexo deploy将你的源码推送到
GitHub上,你的博客一会就会自动更新了。
本博客所有文章除特别声明外,均采用 CC BY-NC-SA 4.0 许可协议。转载请注明来源 Sitoi!
评论


